Auriculas are hardy spring flowering plants. Best results for showing are obtained by growing them in small pots under cover, the exception being Border Auriculas which can be grown in the open harden
Where to grow
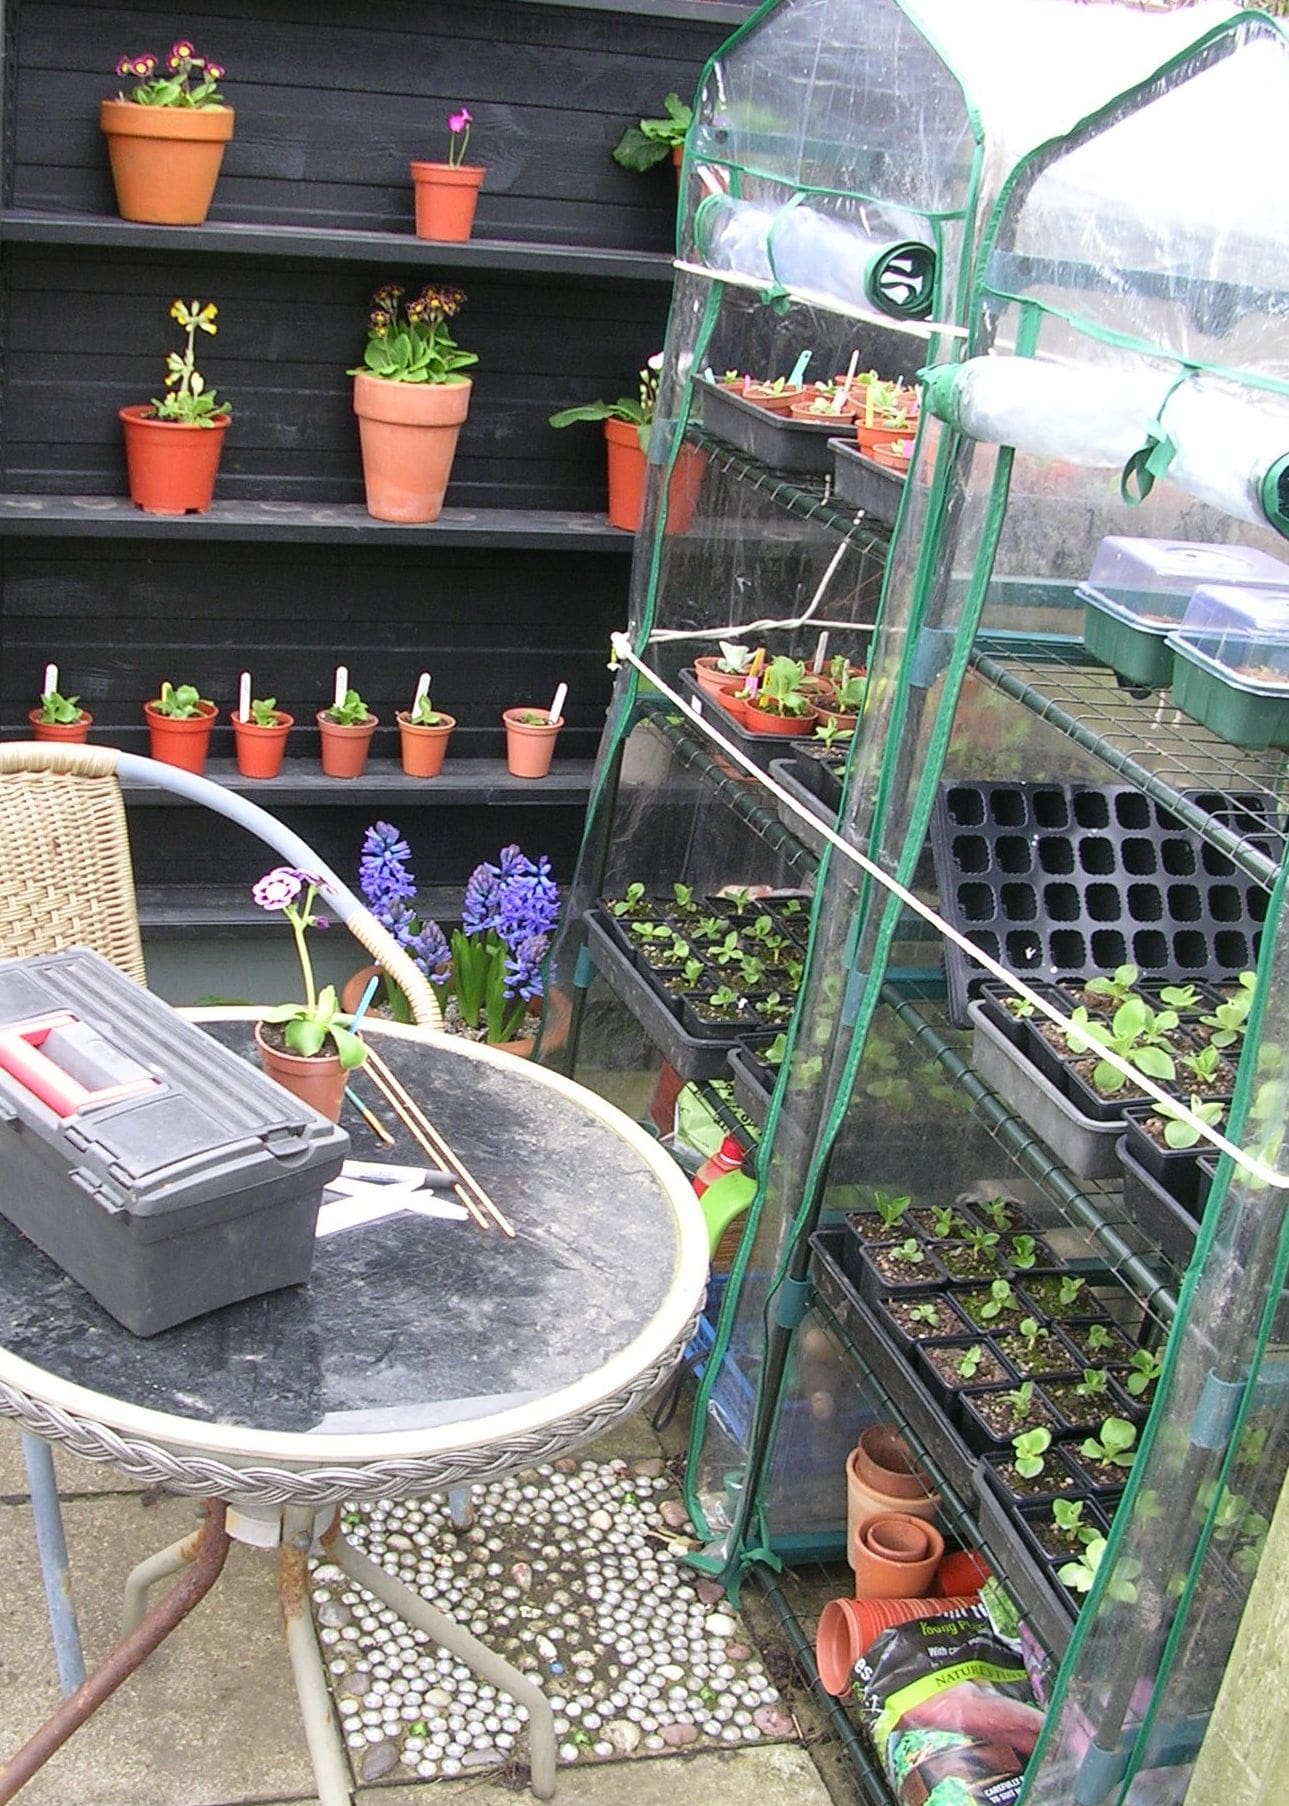
The ideal growing area is in an unheated greenhouse, mini greenhouse, cold frame or even a small table on a city centre balcony. Ensure that protection is provided from winter rain and direct summer sun; greenhouse shade netting is ideal for sunlight protection. Year round ventilation is also essential to protect from disease and rot.
Compost
To avoid root rot and decay, Auriculas must be in free draining compost. A basic mix of equal parts multi-purpose compost; John Innes No. 2 compost and horticultural grit is ideal. Use only the best ingredients, it's not worth using cheap composts.
Auriculas are best grown in plastic or terracotta pots 9cm (3½") is normally the maximum size used.
Feeding & Watering
Over-watering is the easiest way to kill Auriculas. The amount of water needed varies throughout the year, see Care Section, but less is best.
To determine how much moisture is in the compost, try judging the weight of the pot by lifting it, after a little practice it will give you a good indication.
Feeding is another area where less is best. Overfeeding will produce flowers out of character for show standards. It is recommended to provide a spring feed as growth re-starts, a quarter strength tomato feed or liquid seaweed applied twice during March may encourage the required flower production.
Re-potting
Re-potting provides an opportunity to remove off-sets to propagate further plants, see Figure 1 below; check for pests and diseases; and replace the compost and nutrients. This is best done immediately after flowering (unless you are growing for seed); or late July/early August.
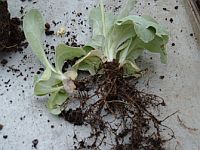
Remove the plant from its pot, tease out all the compost from around the carrot and roots and inspect for decay and pests. Shorten the carrot back to clean flesh if it is diseased or too long for the pot, this also stimulates fresh roots higher up the carrot.
Using only freshly mixed compost and clean pots, re-pot ensuring no air pockets are left around the roots. Water well and store in the shade to recover, ensuring they do not dry out. This balancing of compost moisture content is most important - not too dry but more important not too wet!
Pests and Diseases
Like all plants, Auriculas are liable to attack from pests and diseases, the best way of preventing this is by constant vigilance to spot and treat the problem early.
Vine Weevil is probably the most serious of the pests, where the grub eats all the roots, killing the plant. The first indication tends to be when the plant remains limp after watering. If Vine Weevil is suspected, try searching for the beetle in the dark with a torch - a good tip from one of our most experienced growers. Control is by the use of systemic insecticides or biological nematodes.
Root aphis identified by a white fluffy deposit, often found around the neck of the carrot at soil level and/or around the roots when removed from the pot. Whilst common it is rarely fatal, wash the affected areas with soapy water using a small brush during re-potting.
Red Spider Mite a tiny insect that can be very difficult to get rid of. They prefer hot dry conditions, with the cycle of generations increasing with the temperature. Spray the greenhouse floor with water to keep temperatures down and humidity up.
Caterpillars are often found hiding in the foliage so constant vigilance is required.
Botrytis is a fungus that affects many plant species. It is sometimes called "grey mould" and the spores can spread rapidly causing soft slimy leaves. Remove all dead leaves regularly and dispose of, ensure that there is adequate ventilation.
Seasonal Care
The timings stated below are a guide only and vary depending upon the weather and your own location in the country.
After flowering may seem strange to start the year, however the care and attention needed to produce the best plants for the show bench starts here.
Summer Months
- cross pollinate plants for seed see Grow from Seed Section
- remove dead flowers but not the stem, allow this to die back naturally before removing.
- re-pot plants using fresh compost
- remove and pot-on any off-sets into small pots, remember to label with variety name.
- during the hottest months, keep them as cool as possible with shading and good ventilation. Placing the plants outside in a shaded part of the garden or a cold frame will help.
- keep plants moist but not wet.
- inspect regularly for pests and diseases.
Autumn
- harvest seed when pods turn light brown and start to split
- pot-on off-sets as they outgrow their pots.
- re-pot plants not re-potted earlier in the year.
- remove greenhouse shading as temperatures and light levels drop. Clean glass and benches before winter.
- return outside plants to the greenhouse in October.
Late Autumn/Early Winter
- start to reduce water to a minimum.
- ventilation is still essential.
- plants will start to lose some leaves as they turn yellow, resist the temptation to remove these leaves immediately, but keep an eye open for botrytis.
- sow seed in October or early spring.
Winter
- ventilation is still essential, do not attempt to protect from frost.
- reduce watering to a minimum keeping compost just dry but not dust dry.
- if not sown in October, sow seed in January/February.
February
- as plants show signs of spring growth, gradually increase watering to keep compost only just moist.
- remove top 2cm of compost and replace with fresh. Remove any viable off-sets and pot on.
March
- give two feeds of 1/4 strength tomato feed or liquid seaweed to encourage flower growth.
- Shade green house towards the end of the month as light levels increase.
- prick out seedlings into trays or pots as they grow.
- select flowering plants for showing, clean and prepare to show them to best effect.
- select flowering seedlings from the previous years sowing that are of show standard, dispose of the others or give them away to friends, you will very quickly run out space otherwise.
- select plants in flower for seed production and cross pollinate.
Growing from Seed
Whilst Auricula off-sets are true to their parent, those grown from seed are not. However this is how we raise new varieties.
Obtaining quality seed can be a problem, the best may be obtained from the Society Seed Exchange (restricted to members only); or by producing your own seed from your own plants for free.
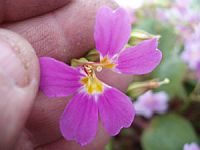
The best time to make crosses is around midday on a bright warm sunny day when the pin or stigma becomes sticky and receptive, also make sure the pollen to be used is ripe, a good golden colour and fluffy. If it is a dull colour with a slight grey appearance its past its best and probably no good. The easiest method of pollinating is to carefully tear open the petals with pollen attached (Figure 2), to expose the stigma (Figure 3) and set them aside. Repeat this for the second plant. Holding the removed torn petal with exposed stamens from the first plant, touch the stigma on the second plant ensuring that pollen adheres, make a note of the cross parents on a label and put this into the pot with the plants you have pollinated. It is also a good idea to tie a piece of twine or wool around the stem of the pips pollinated, just to remind you which seed pods are the actual crosses. Repeat this process with the other plant to give two plants with the same cross. These often produce different results. See video below.
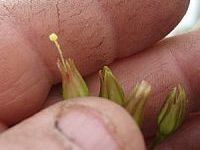
A greenhouse or cold frame is the ideal home for your Auriculas prior to and after pollination. The plants should be kept shaded and cool where possible with good ventilation. Fine mesh over open doors and windows will allow for ventilation and keep bees and other insects from contaminating your crosses. Once the pods swell and the green cover over the seed pod changes to the colour of straw and cracks across the cover (Figure 4), carefully remove the seed pods and place into small paper or glassine envelopes (never use polythene bags this can cause rot) clearly marked with the names of the parent plants crossed. Allow to dry naturally indoors and then separate the seed from the husks. Return the clean seed to their envelopes and store in an airtight container (an old jam jar is ideal) in the refrigerator, not the freezer, until sowing.
Sow the seed in September/October or January/February the following year. Spare seed can be saved for a number of years in the fridge and shared with friends, or sent to the Society Seed Exchange scheme.
Using small seed trays or pans, sow the seed onto the surface of compost (50/50 compost and sand) or Seed Compost, which has been pre-soaked. Cover the seed with a very thin layer of dry sand or vermiculite and cover the tray or pan with a sheet of glass. Keep it away from direct sunlight and germination should take place in a few weeks. Keep the glass on until ready for transplanting, ensuring they never dry out.
When the seedlings produce their first pair of true leaves, transplant them into seed trays. Remember the labels with crosses identified
As the seedling grows, keep re-potting to give more space, gradually change the compost towards that which will be used for the adult plants.
Finally transfer into 7x7x8cm black plastic pots to see them through the winter. Remember to label each pot for identification. Flowering should take place the following Spring.

